Long live long context with Gemini

A practical exploration of using Gemini's long context window capabilities to analyze multi-page documents, featuring a Streamlit app for testing and iterating prompts.
Learn how to move beyond traditional RAG approaches for document analysis and leverage the power of large context windows for more accurate information retrieval.
The open source code is available here.
Introduction
Last week, a friend of mine was mentioning an interesting challenge that they had. They had to handle multiple documents with over 200-300 pages each with text, tables and images. Their current process of doing this with RAG wasn't leading to the best results and it was very time consuming when analyzing the results. But also there wasn't a systematic approach being taken to improve the prompt for data retrieval (e.g. few-shot prompt).
Given that I had been reading about people saying that "RAG is dead" because of Gemini models havign 1M+ input context, I wanted to test this model myself. At the same time I wanted to help my friend in setting up a pipeline that would help them automating their data retrieval pipeline.
This post is going to focus on the approach I took, why and how you can set it up yourself.
Note: This isn't meant to be a production ready pipeline, but enable you to "vibe test" your ingestion pipeline + data retrieval model + prompts. Funnily enough, this was mostly built in a day through vibe coding (Karpathy's coined the term recently).

Starting point
This is what my friend sent me:
- Complex PDFs with 200 pages comprised of text, images and tables
- An Excel spreadsheet with rows corresponding to values that were being attempted to retrieve and columns including prompt, value returned and correct value.
The Excel spreadsheet effectively served as eval, which enabled them to understand whether a better model/pipeline would lead to better results or not. However, this process was very manual.
The equivalent here is the following:
-
I will be using the following documents: DeepSeek_R1 paper and Capital Market Outlook report. I just had these two at hand to serve as an example.
-
I won't be using an Excel spreadsheet, but instead will rely on files in a directory called
datawithin the project.
Here are the prompts that I'm going to test:
| idx | ID | Prompt | Expected Result |
|---|---|---|---|
| 0 | Consumer Discretionary vs Consumer Staples comparison cap-weighted | By how much did Consumer Discretionary outperform Consumer Staples over the last three months on cap-weighted? | +17% |
| 1 | Consumer Discretionary vs Consumer Staples comparison equal-weighted | By how much did Consumer Discretionary outperform Consumer Staples over the last three months on equal-weighted? | +13% |
| 2 | Fed funds rate Q4 2024E | What is the Fed funds rate, end period (%) for Q4 2024E? | 4.38 |
| 3 | DeepSeek-R1-Zero GPQA Diamond pass@1 | What was DeepSeek-R1-Zero GPQA Diamond pass@1 benchmark? | 73.3 |
| 4 | DeepSeek V3 C-SimpleQA | What was DeepSeek V3 C-SimpleQA bemchmark? | 68.0% |
| 5 | Number of reasoning related training samples | How many reasoning related training samples were collected? | 600k |
Note: Prompts 0-2 can be found in Capital Market Outlook report whilst prompts 3-5 in DeepSeek R1 paper.
Setting up this experiment
Architecture
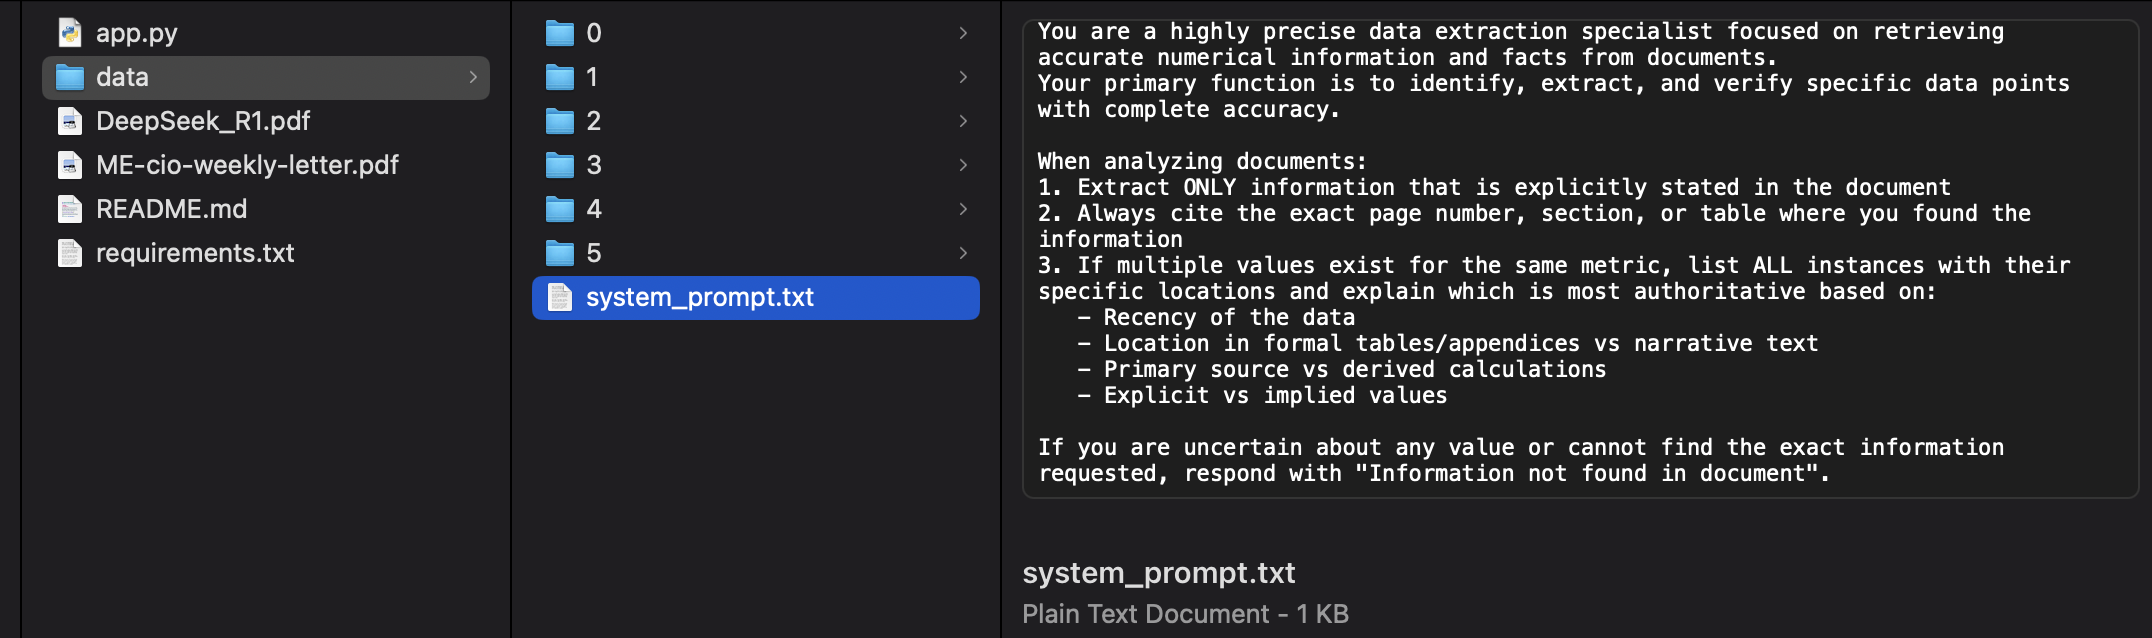
Create a folder called data with the following structure:
data/
├── system_prompt.txt
├── 0/
│   ├── id.txt
│   ├── prompt.txt
│   └── expected.txt
└── 1/
    ├── id.txt
    ├── prompt.txt
    └── expected.txt
See our example here.
Let's go through each of these:
System prompt
Contains the system prompt to be used throughout entire application in a system_prompt.txt file.
Prompt
Each prompt will have a folder with the idx in the order of it being run - e.g. 0, 1, 2, ...
Inside this folder you will find 3 files: id.txt, prompt.txt and expected.txt. Note that this follows the table that we displayed above.
ID
Contains an identifier that we can use to understand what prompt that is. This can be a slug of the prompt, a KPI number or anything else. It doesn't affect anything apart from helping user to be able to distinguish more easily between prompts at a higher level.

Prompt
Contains the actual prompt to run through all the documents that have been loaded.

Expected
Contains the expected value or information to be retrieved.

Running the Streamlit app
Clone this repository.
Install the following libraries with pip install <library>:
streamlit
google-generativeai
PyMuPDF
pytesseract
pdf2image
Pillow
or simply do pip install -r requirements.txt.
Retrieve a Gemini API key from here.
And finally run streamlit run app.py.
Note: This application has 500 lines of code and all the logic lives in app.py.
How the app works
1. Gemini API key
Since the purpose of this is to test Gemini 2.0 Flash model, then we are asking for the API key to be inserted at the top of the script. It could also have been done through .env variable which in general is a better alternative, but I wanted to make this more easier on the people who will run this script.

2. System Prompt
This is the system prompt that will be used across all prompts utilized to retrieve data from context.

The EDIT button allows user to modify the content that lives in data/system_prompt.txt and override it.
3. Load documents
This allows the user to pick any document that are next to the app.py file on the root of the project. You can select multiple documents and their content will be appended together.
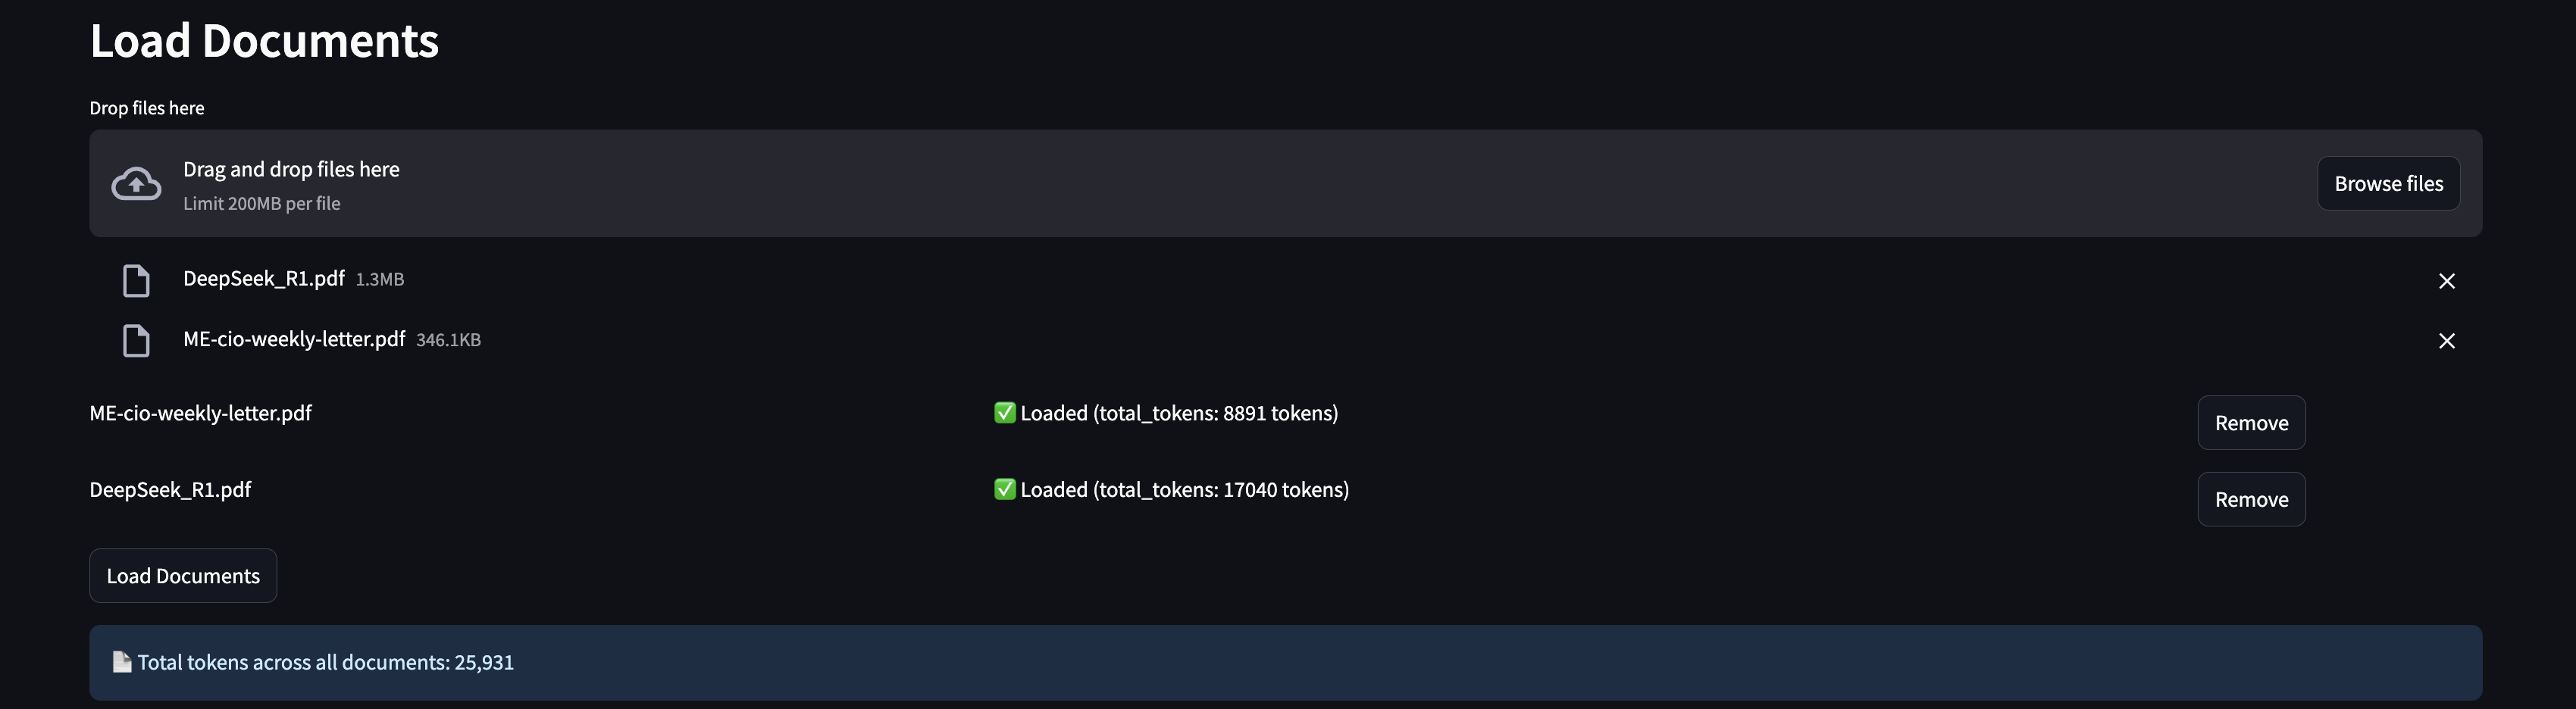
When a document is loaded, you will be able to understand how many tokens each document utilizes when being pushed into Gemini 2.0 flash - through model.count_tokens(). In addition, you will understand how many tokens are being utilized with the combination of all documents uploaded.
4. Run prompts
This one is slightly more complex, let's take it each section at a time.
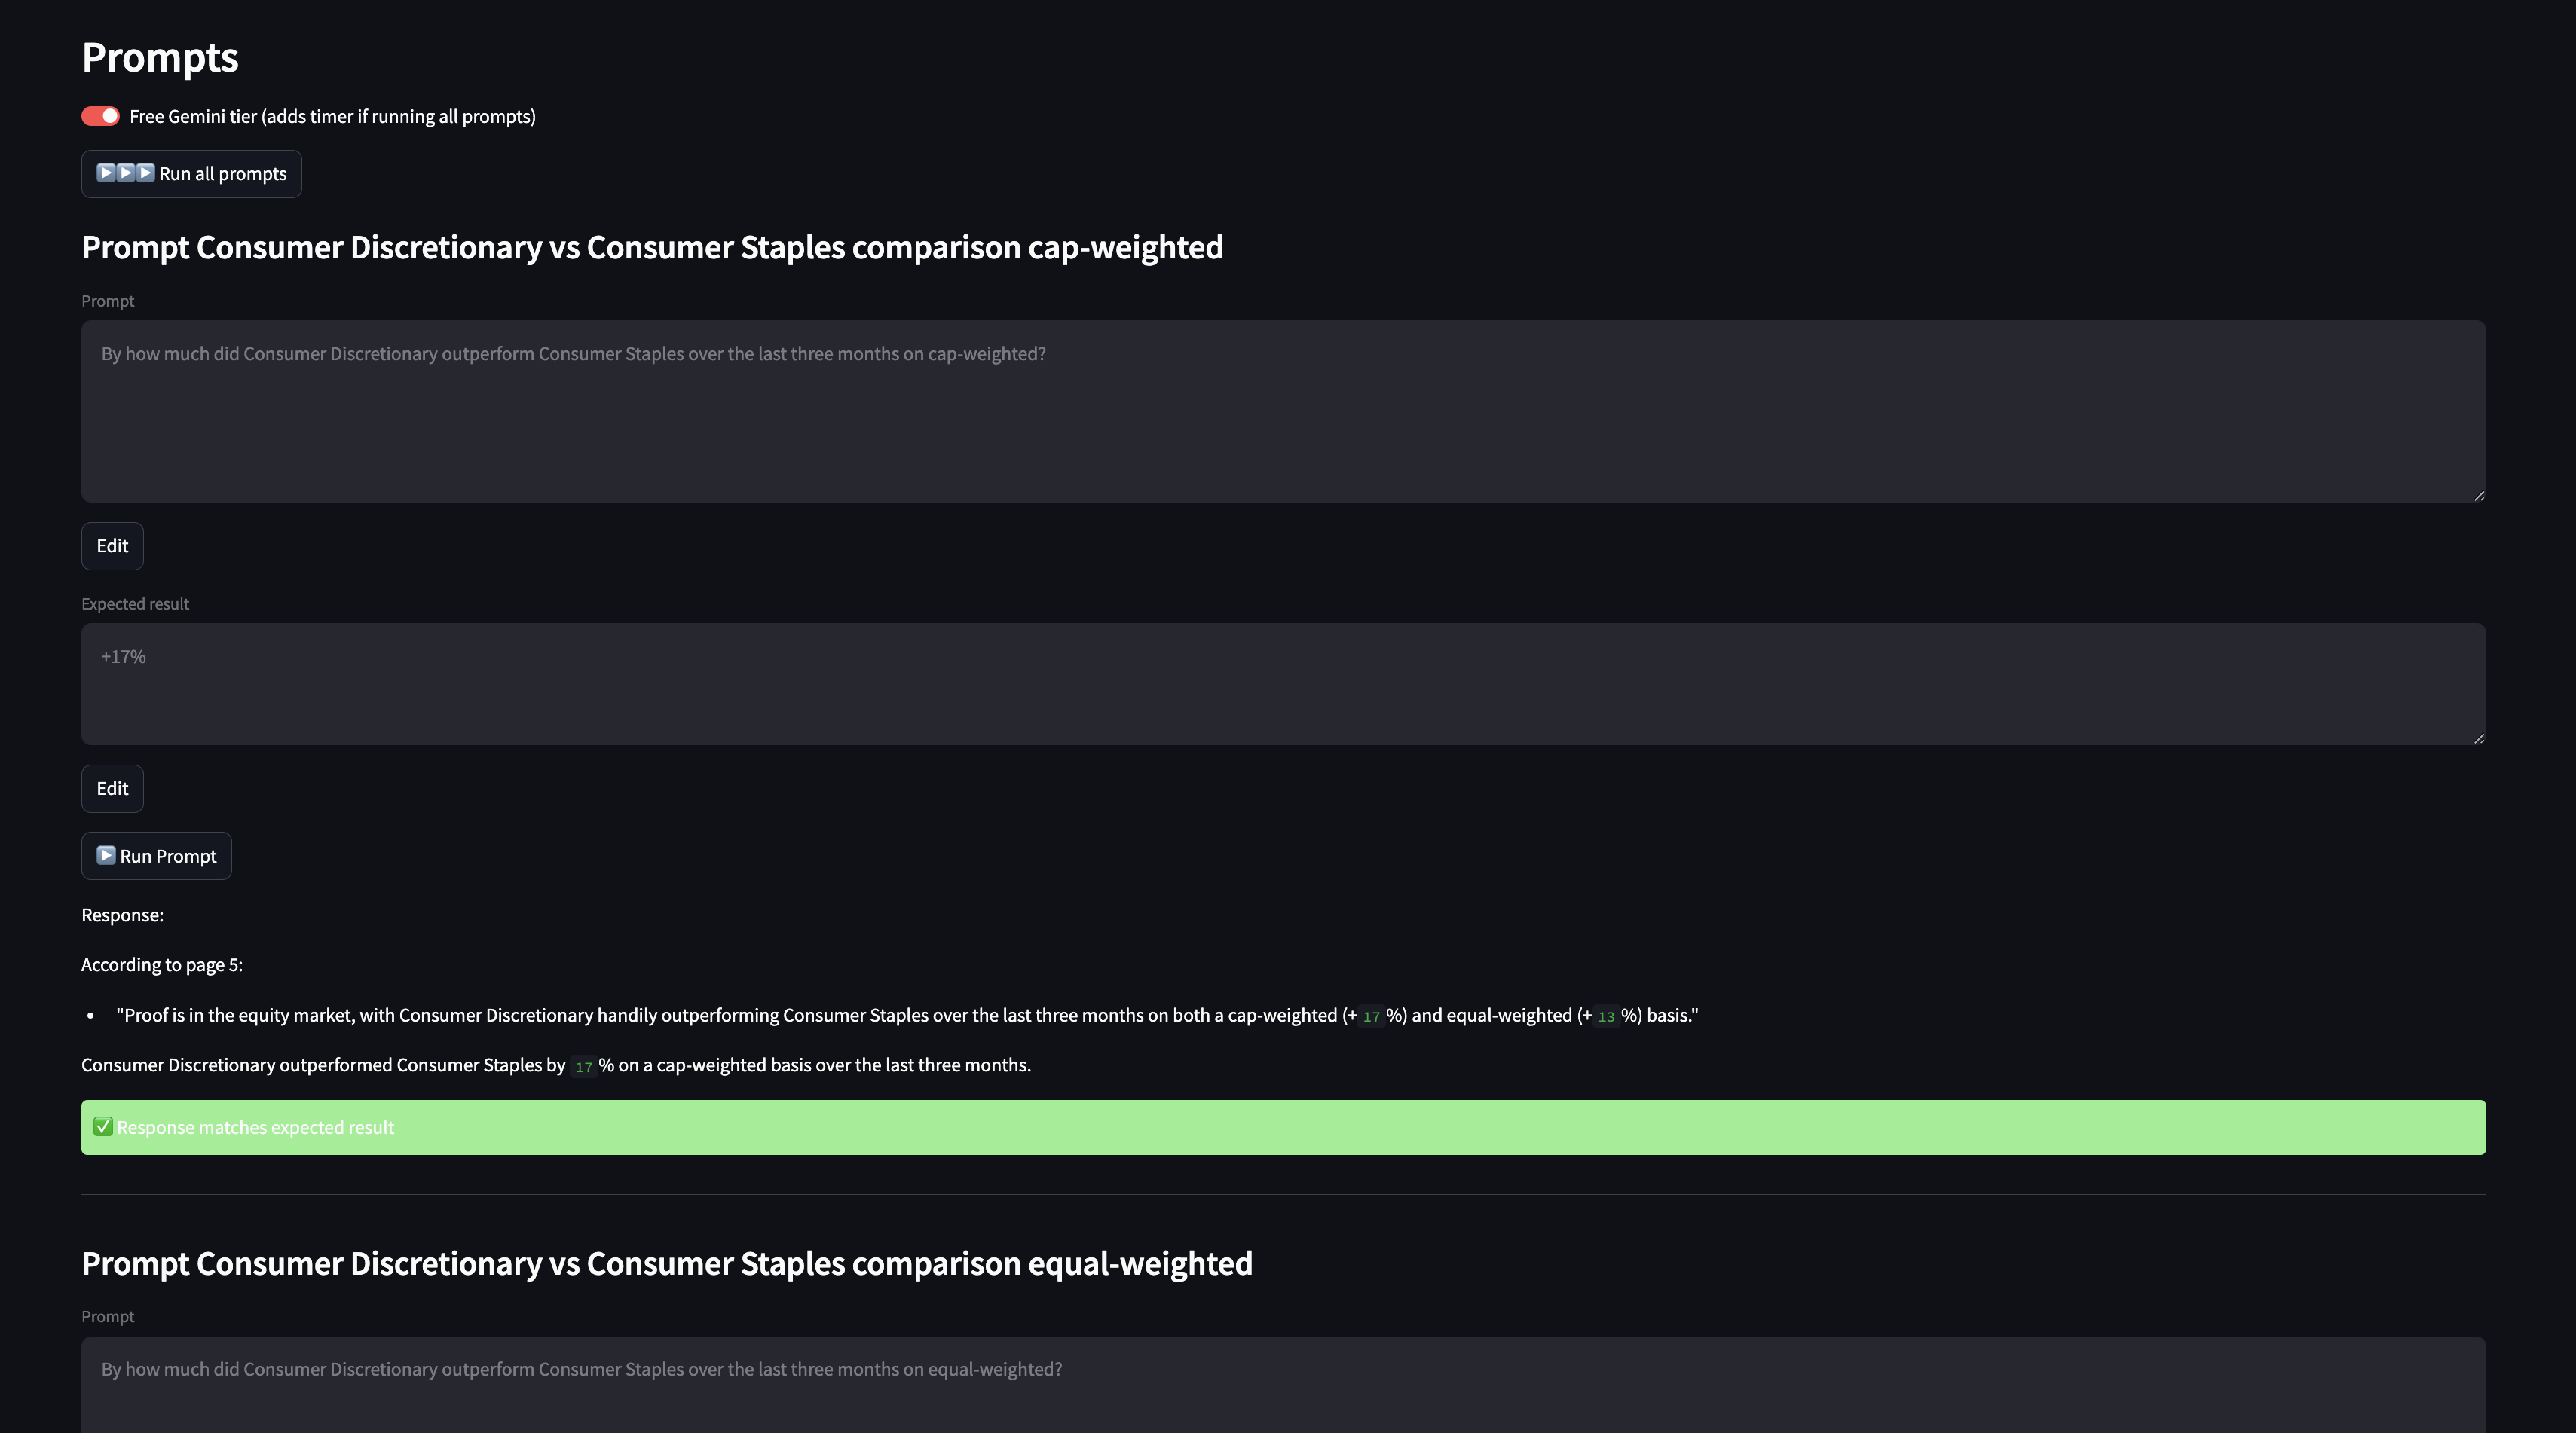
Run all prompts
By clicking on "▶️▶️▶️ Run all prompts", all prompts get run utilizing Gemini 2.0 Flash with the context provided, in the following format:
response = model.generate_content(
  f"""
  {system_prompt}
  ---
  {st.session_state.document_content}
  ---
  {prompt}
  """,
  generation_config={"temperature": 0},
)
The "Free Gemini tier (adds timer if running all prompts)" toggle is meant for users that aren't paying for Google API and adds a 60s delay after running each prompt. Note: Upgrading to a paid API key is recommended if you are dealing with sensitive data, so that your data is not used by Google for training.
Remember: "If something is free, you are the product" 🙂.
Now you may be wondering:
"Why is there a green '✅ Response matches expected result' box. How does the model know that the answer is accurate?".
That is because after running the prompt, I take the output and use Gemini 2.0 Flash to compare it against the compared answer. Basically doing LLM as a judge so I have a quick sense of how many prompts I got correct and which ones I didn't and work on the failed ones.
This is the prompt that happens under the hood:
comparison_response = model.generate_content(
  f"""
  Compare these two texts and return only 'True' if they convey the same meaning,
  or 'False' if they differ in meaning.
  Don't worry about units as long as the numerical value are the same.

  Do not add anything else. Just one word: 'True' or 'False'.

  Expected:
  {expected}

  Actual:
  {response.text}

  The meaning of the expected response and the actual response is the same. This statement is:
  """,
  generation_config={
      "temperature": 0,
      "candidate_count": 1
  },
)
Individual prompts
The concept of running an individual prompt is very similar to the run all prompts, with the exception that it takes approximately "Run all prompts time"/"Number of all prompts" for each. So it's better to iterate on a single prompt and the quality of its data retrieval.
In addition, it has a few additional features that can be helpful to iterate:
- You can click on "EDIT" to edit the
prompt.txtdirectly from the interface. This enables to tweak the prompt to be better at retrieving that specific information (e.g. few shot prompt, which is something that my friend wasn't doing and was contributing to lower accuracy). - You can click on "EDIT" to edit the
expected.txtdirectly from the interface. This was particularly relevant when I saw that the LLM as a judge failed when the model retrieved 68.0% for a particular prompt and the expected string I had was 68.0. In this case, the model was actually accurate and my expected value should have been either 68.0% or 0.68.
Final thoughts
Data ingestion
This is one of the most important parts of the workflow:
# Convert PDF to images
images = convert_from_path(tmp_path, dpi=300)  # can be increased for higher accuracy

# Open PDF with fitz
pdf_document = fitz.open(tmp_path)

file_content = ""

# Process each page
for page_number in range(len(pdf_document)):
  page = pdf_document.load_page(page_number)
  if page.get_drawings():  # OCR needed for vector content
      text = pytesseract.image_to_string(
          images[page_number], lang="eng"
      )
  else:  # Extract text directly
      text = page.get_text("text")
  file_content += text + "\n"

pdf_document.close()
From my friend results, I saw that it was consistently failing for a few prompts. The main reason for that was because the data was in a table that was an image underneat and the PDF reader didn't parse images. That meant that it didn't matter how good the prompt was, the model was set up for failure.
I don't think the pipeline I've built is particularly strong but it highlights an example of how one can handle a scenario with text, tables and images going through each page individually by:
- Check if there is an image
- If there is, do OCR using Tesseract to extract text
- If there isn't, use PyMuPDF to extract text
I believe that something that would improve results immediately is running the output of the OCR by a LLM and trying to reconstruct the table/image in markdown format if possible. I say this because I noticed that sometimes the OCR output can be a bit messy, and having an LLM focused on adding structure to each page OCR may lead to better outcomes.
Long context is a blessing
Something I noticed from the data my friend shared is that the RAG pipeline they had implemented struggled when the value that the model had to return wasn't immediate but it had to pick values from different places to piece it together.
Imagine you were asking the model about the number of reasoning related training samples and the PDF mentioned that the number of reasoning related training samples was 2% of the training dataset samples. And in another page it said that the training dataset has 30 million samples. You need to get both of these in order to infer that the number of reasoning related training samples is 600k samples.
Subject matter experts are more relevant than ever
Despite advances in LLM capabilities, domain expertise remains crucial for effective prompt engineering. During testing, many retrieval failures stemmed not from model limitations, but from prompts that didn't properly account for domain-specific context and terminology.
As a non-expert, I found it challenging to craft effective prompts because I lacked deep understanding of:
- How specific data points are typically represented in this type of document
- The precise meaning and significance of domain terminology
- Common document structures and conventions in the field
- How small variations in wording could make it so that the metric extracted wasn't the correct one
Set a benchmark and work reverse from there
Before starting this work I had a benchmark where I was working backwards from. This was super helpful as it allows me to understand how this workflow, out-of-the-box, compares with my friends' one.
Then we can work backwards from there and:
- Improve the system prompt
- Use a different model (and get rid of RAG eheh)
- Improve ingestion pipeline to process images
- Automate process a bit better with a Streamlit app
- Improve each individual prompt to retrieve information more accurately (few-shot prompt)
Prompt testing and validation
Using LLMs as judges and being able to run prompts from the app, enabled to have a much more seamless workflow. This approach:
- Provides immediate feedback on prompt effectiveness
- Helps iterate and refine prompting strategies
- Ensures consistency in information extraction
- Reduces the need for manual verification
Long live Long Context
Honestly, long context is f*ing awesome.
Here are a few things that made me really happy:
- Ability to handle multiple documents at once without having to worry about chunking or managing context windows
- No need to worry about losing context between different sections of a document
- Reduced complexity in the overall pipeline since we don't need complex RAG infrastructure
- Better accuracy (in theory) since the model has access to the full context and can make connections across different parts of the document
- Faster development time since we don't need to spend time optimizing chunking strategies or fine-tuning retrieval mechanisms
Next
I won't be spending more time on this project, as I did it to help a friend on their specific problem. I wrote this post so that I could share this with them and any other person in the future that is getting into LLMs.
Feel free to fork the project and go wild.